C.1.3 Picture map
The PICSimLab use one picture image map for inputs and outputs.
The inputs are the areas in board picture which user can interact (by mouse click) and start with letters “I_”.
The output are the areas in board picture to be redraw according simulator status and start with letters “O_”.
The bidirectional areas in board picture which user can interact and need to be redraw according simulator status are started with letter “B_”.
The picture map used for PICSimLab are normal HTML image-map. They can be made by hand or using any software which can handle image maps. The original PICSimLab maps are made using Gimp image editor.
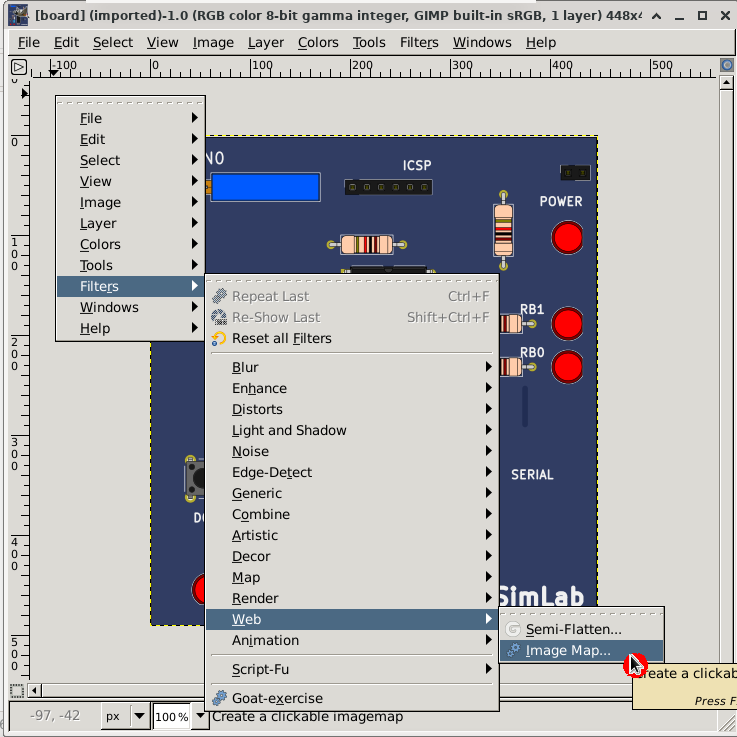
To start, in the GIMP, use the Filters->Web->Image Map to open image map editor window.
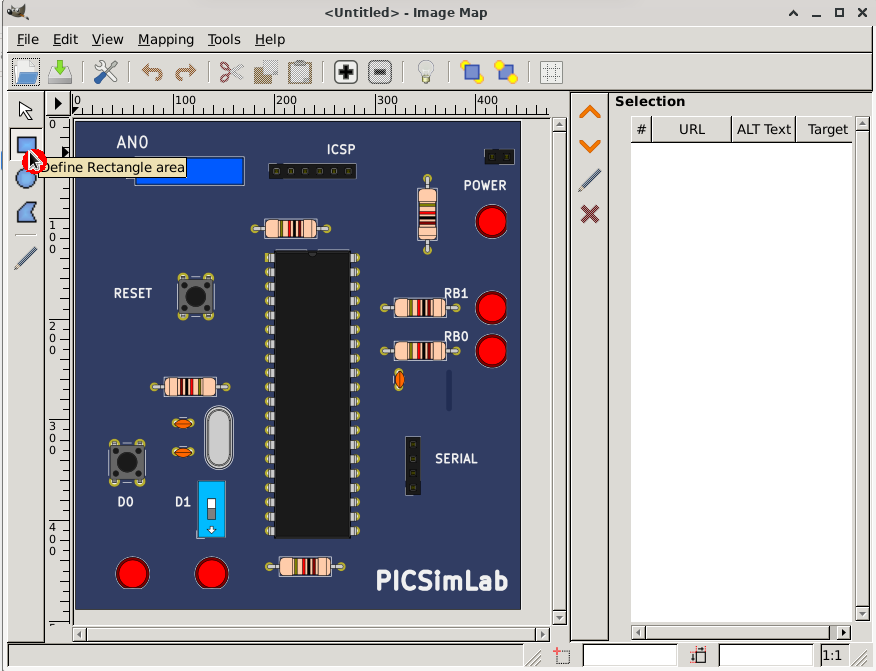
Then select rectangle or circle map on toolbar.
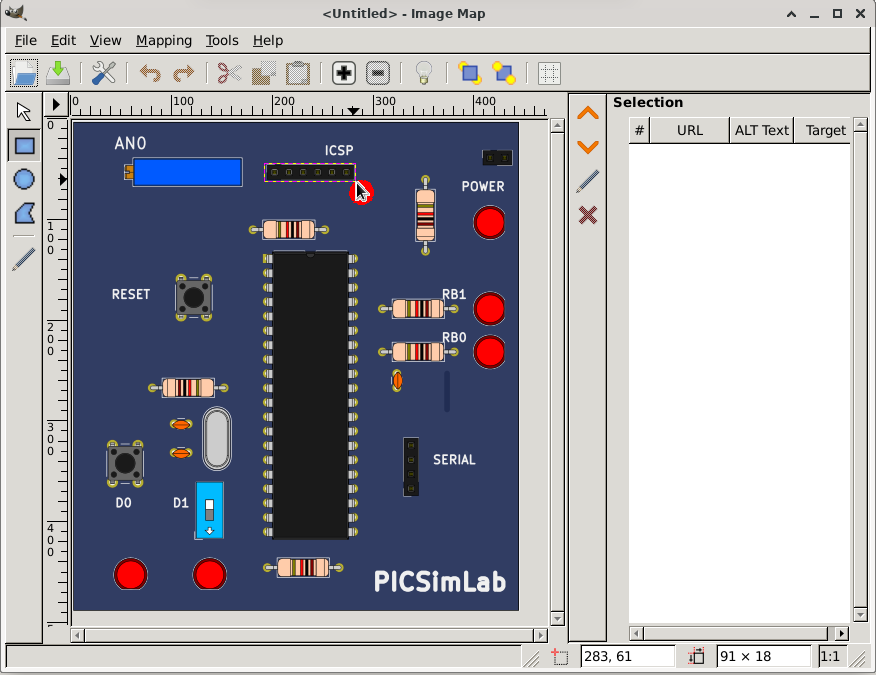
And mark the area in picture.
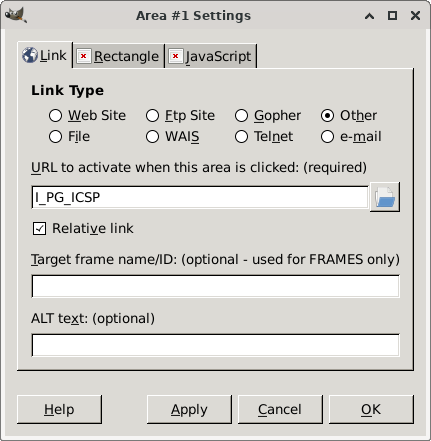
After area is select, in the settings windows select the link type for “Other”.
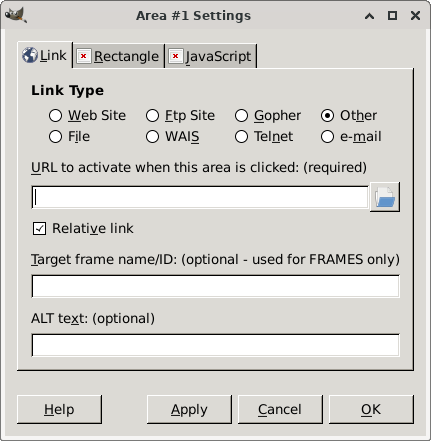
And write the name of area. The name must describe the area function on the board and follow the Picture Map Reference.
Board map
For this tutorial board, twelve areas are marked:
- I_PG_ICSP - where user click to load hexfile.
- I_SW_PWR - where user click to turn on/off the board.
- B_SW_D1 - Switch connected in RD1.
- B_PO_1 - Potentiometer connected to RA0.
- B_PB_RST - Button to reset board.
- B_PB_D0 - Button connected in RD0.
- O_LD_LD0 - draw LED connected in push button D0.
- O_LD_LD1 - draw LED connected in switch D1.
- O_LD_LPWR - draw power LED indicator.
- O_LD_RB1 - draw LED connected in RB1.
- O_LD_RB0 - draw LED connected in RB0.
- O_IC_CPU - draw microcontroller name.
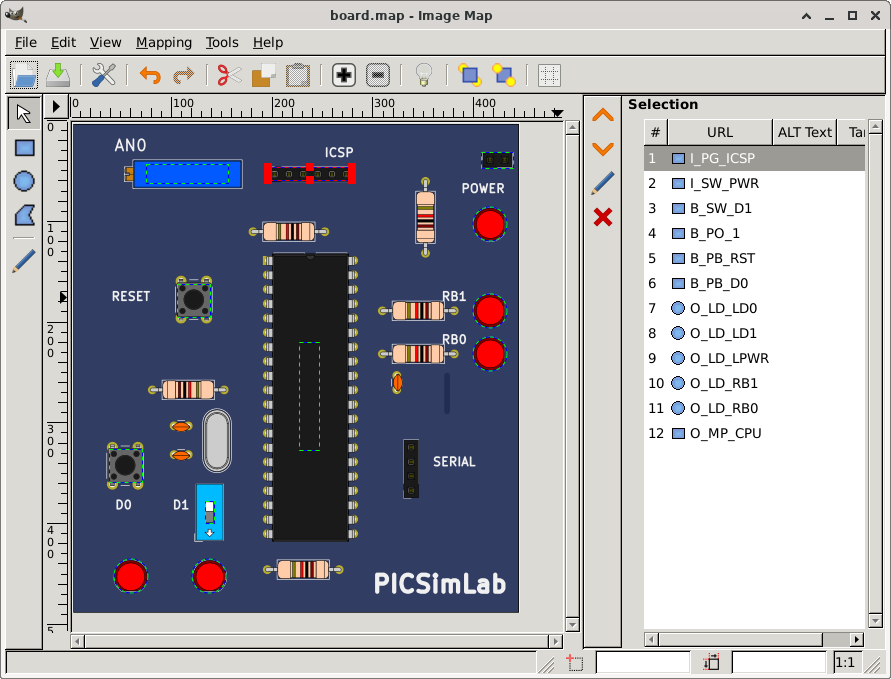
Board map generated by Gimp image map editor and saved as “share/boards/X/board.map”.
1<img src="[board_x] (imported)" width="448" height="491" border="0" usemap="#map" />
2
3<map name="map">
4<!-- #$-:Image map file created by GIMP Image Map plug-in -->
5<!-- #$-:GIMP Image Map plug-in by Maurits Rijk -->
6<!-- #$-:Please do not edit lines starting with "#$" -->
7<!-- #$VERSION:2.3 -->
8<!-- #$AUTHOR:lcgamboa@yahoo.com          -->
9<area shape="rect" coords="196,45,280,58" href="I_PG_ICSP" />
10<area shape="rect" coords="409,30,441,46" href="I_SW_PWR" />
11<area shape="rect" coords="133,379,142,401" href="B_SW_D1" />
12<area shape="rect" coords="74,42,156,61" href="B_PO_1" />
13<area shape="rect" coords="105,162,138,195" href="B_PB_RST" />
14<area shape="rect" coords="37,327,70,360" href="B_PB_D0" />
15<area shape="circle" coords="59,454,17" href="O_LD_LD0" />
16<area shape="circle" coords="137,454,17" href="O_LD_LD1" />
17<area shape="circle" coords="418,102,17" href="O_LD_LPWR" />
18<area shape="circle" coords="418,189,17" href="O_LD_RB1" />
19<area shape="circle" coords="418,232,17" href="O_LD_RB0" />
20<area shape="rect" coords="227,220,247,328" href="O_IC_CPU" />
21</map>
The kicad project files can be download from github PICSimLab repository.